How to make a pinhole camera
Fancy trying your hand at pinhole photography? It opens up a whole new world of dreamy images, long exposures, enormous depths of field and ultra close-ups.
And it’s not too difficult to turn your DSLR into a pinhole camera.
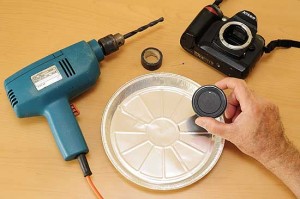
Materials needed
- A camera body cap. (N.B. Not the lens cap.) A body cap is the circular piece of plastic that fitted in to the lens opening to seal the camera body when you bought it. You can use the one that came with your camera, but I’d advise you get another. Most specialist photo shops sell them for a few bucks.
- A largish drill (exact size is not important. I used an 8mm one). And don’t worry – you’re not going to drill your camera.
- A countersink bit (if you are a perfectionist).
- A sharp pin or needle.
- A piece of sandpaper.
- Sticky tape, preferably black. Duct tape or insulating tape will do.
- A piece of heavy-duty aluminium cooking foil. Foil from a pie dish is ideal.
First steps:
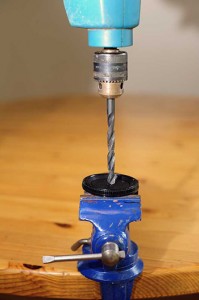 Place the cap on a piece of white paper and draw a line around it, giving you a circle.
Find the centre of that circle (see here for a simple way to find the centre of a circle) and, using the paper as a template, mark the centre of the body cap.
Drill a hole through the centre of the cap.
If you want to be a perfectionist (I am) you can use a countersink bit to chamfer the edges of the hole on the outside.
If you don’t have a large enough drill you can cut a square hole out of the plastic using a craft knife.
Making the pinhole ‘lens’
Next, cut a square of aluminium foil, significantly bigger than the hole you’ve just drilled and, using your pin, make a tiny indent in the metal. Don’t push all the way through!
Then, very gently, sand down the opposite side – where the pin pushing through has raised the foil slightly – so your sanding flattens it and wears through. This is when the hole is made.
Next, very carefully, fit the tip of the pin in the hole and twirl it around to remove any burrs and make it perfectly round. Don’t push the pin through any more. ‘Drill’ with it, rather than push. The object is to get a perfectly round hole that is as small as possible.
Having made a pinhole to your satisfaction (you can hold it up to the light to see how it’s going) position the foil on the inside of body cap so the pinhole is in the centre of the bigger hole and stick it in place with the tape. Once you’ve done this it’s a good idea to carefully place more tiny strips of black tape over the exposed aluminium inside (being careful not to block your pinhole). The aim is to cover as much of the reflecting surface inside the camera body as you can in order to minimise internal reflections. With the long exposure times required for pinhole photography even a small amount of silvery tinfoil can bounce stray light around inside the mirror chamber, leading to degraded image quality.
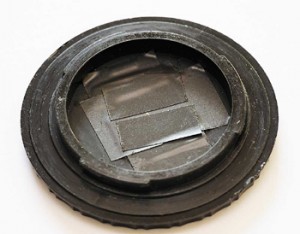 |
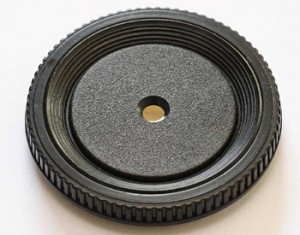 |
| Inside view of the pinhole ‘lens’ | Exterior of the pinhole ‘lens’ |
Once you’ve done all that, fit your modified body cap on the camera in place of the lens and … voilá! … you have a pinhole camera.
A tripod is essential for taking photographs with this set-up as the shutter will have to be open for 15-30 seconds or more – even in direct sunlight. And you’ll have to find the correct exposure time by a process of trial and error. The metering will not work! You’ll find that, with this system, you have quite a wide angle lens, and it will have a vast depth of field. However won’t be able to see much of this through the viewfinder so framing your shot will have to be trial and error too.
And another small warning … Because your pinhole has an incredibly small aperture, the resulting images will show every, but every, single speck of dust on your sensor. Don’t get neurotic about this. Dust on the sensor is unavoidable. Just be aware that you may be in for a surprise as to how much there really is – even if you use sensor cleaners.
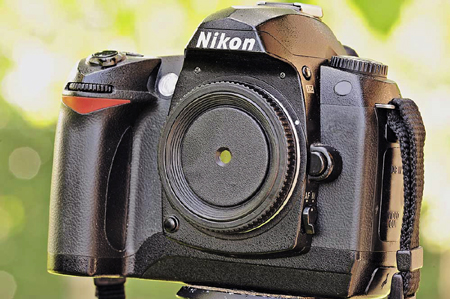
Happy pinholing!

Thanks for the info Alistair. Don’t have a DSLR yet, made one for my Pentax K1000.
Works great.
Hole approx. 0.3mm, exposure times around 1 – 2 sec with ISO 400 film (compare to same conditions, F11 and 1/125 sec.)
D
That’s great Dan. I’m glad my technique worked for you. I find pinhole photography fascinating. Not all subjects are suitable for it … which helps develop your ‘eye’ … but when you idebtify those that do work I find you get some lovely ‘dreamy’ images.
Did you know there’s a ‘Pinhole Photography Day’ each year on the last Sunday in April? The next one is 25th April 2015 and details here.