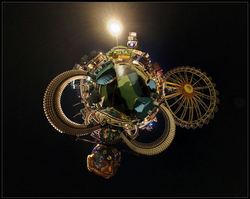
How to create panoramic photographs

Producing panoramas – those wonderful wide shots that take in the full sweep of a scene – can done relatively easily with digital images.
- Find your panoramic view. Panoramas work best if you choose a spot where you have a ‘frame’ on either side of the picture, as in my panorama above. The snow-covered pine tree to the left, and the wooden chalet to the right, help to give this photograph a sense of depth and perspective
- Use a 50mm lens (or set your zoom to 50mm). This focal length gives a image that is closest to what you see with your eyes. And lenses of that focal length suffer from minimal distortion. Don’t be tempted to use a wide-angle lens. At first glance they may seem ideal for panoramas. But they’re not. Most wide angle lenses show significant distortion at the edges of the picture, making it nearly impossible to ‘stitch’ them together accurately
- Set your camera’s exposure controls to ‘manual’ and select the shutter speed and aperture to give a correct exposure for the brightest part of the scene. If you leave it on automatic you will, again, probably have problems back at your computer. This is because the light changes as you swing around taking photographs from side to side. The automatic exposure controls will try to compensate for this and you will get a series of images with different shades of light and dark. Keep the exposure the same throughout
- It is also a good idea to turn off the Auto White Balance and set it, instead, to daylight. Colour temperatures can vary across a scene and if your camera tries to compensate for them you may get images with differing colour casts
- It’s best if you mount your camera on a tripod, with it perfectly horizontal. However, if you are careful, you can take hand-held panoramas. They just won’t be quite as accurate, that’s all. Take a series of photographs from side to side, overlapping each one with its neighbour by about 20-25%
- Back at your computer, use an image editing program such as Photoshop, or a dedicated panorama stitching program to join the images together. There’s details of a great freeware panorama stitching program in the sidebar to the right
One of the biggest headaches in creating panoramas is that the images will not quite fit together exactly and have to be carefully brushed/blurred to hide the join.
This is because the lens of your camera is trying to render a 3-dimensional scene on to a 2-dimensional plane (the sensor in your camera). The way around this is to make sure that, as you swing around to take the shots, the lens of your camera pivots about its ‘nodal’ point’. This is the point where light rays cross before being focused on to the film plane.
The way to do this is by using a panoramic mount on your tripod. Professionally-made panoramic mounts cost a bomb, and probably aren’t worth the money unless you’re heavily into panoramas. However, if you’re handy with a saw and drill, details of how to build one for yourself, in wood, can be found here.
Or if you are a skilled metalworker this page shows you how to make one out of aluminium.
Oh … and don’t forget … panoramas can be vertical as well as horizontal.

What do you think?
(Please note: though your email address is required to control spam, it will not be shown or re-used in any way)
You must be logged in to post a comment.